Texas X Riders

Please login or register.

Login with username, password and session length
Advanced search  
Pages: [1] 2

Author Topic: Fairing Project – 2005 Honda VTX 1300 R  (Read 23523 times)

0 Members and 1 Guest are viewing this topic.

jarubio

  • Texas X Rider OverLord
  • ******
  • Posts: 1106
  • Round Rock, TX
Fairing Project – 2005 Honda VTX 1300 R
« on: June 16, 2010, 06:29:06 PM »

As promised, here is my fairing installation project. I’m no wrench head. I’m a computer guy. I did have some issues, but at the end, I’m very satisfied with the end result.
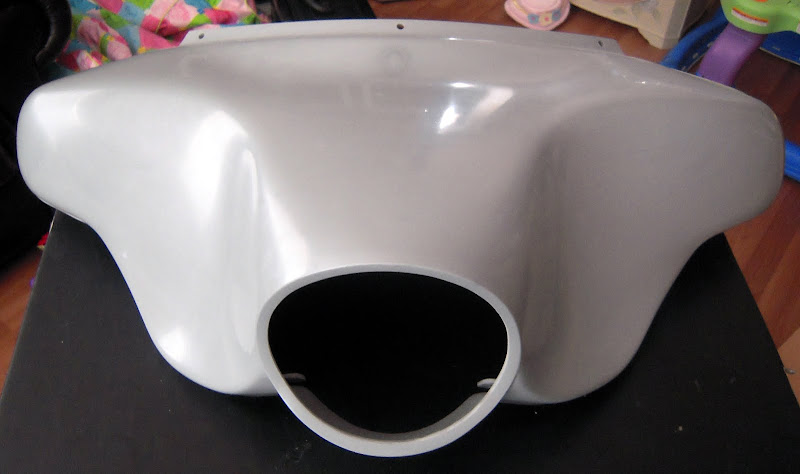
I decided to use an Xtreme Revolution fairing. There were three reasons why I chose this fairing.

-Cost
-Looks
-And it came in two pieces (more of this later)

As some of you may know, Xtreme Revolution was going out of business, but they will still stay in business, they will be selling there fairings via EBay. The fairing arrived in one big box, inside was the fairing and the bat-wing storage compartment.


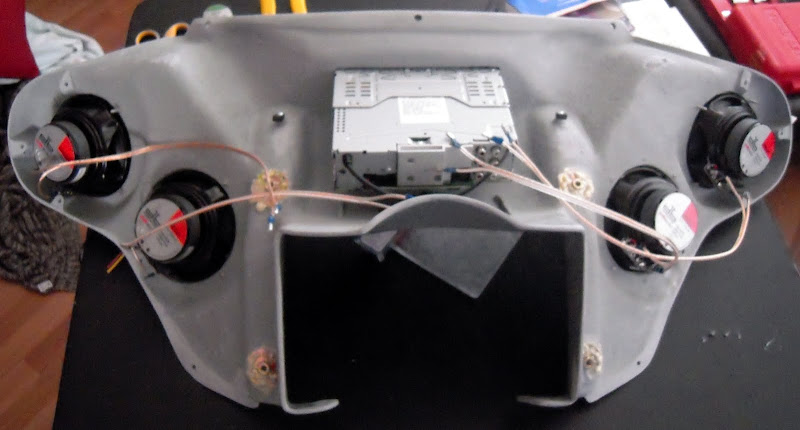
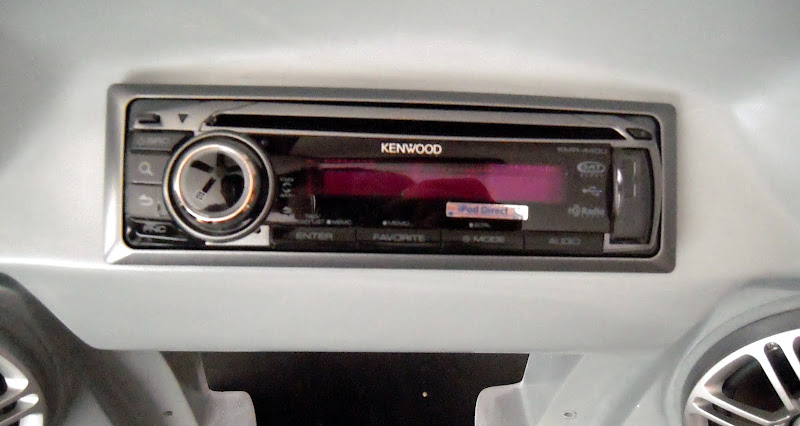
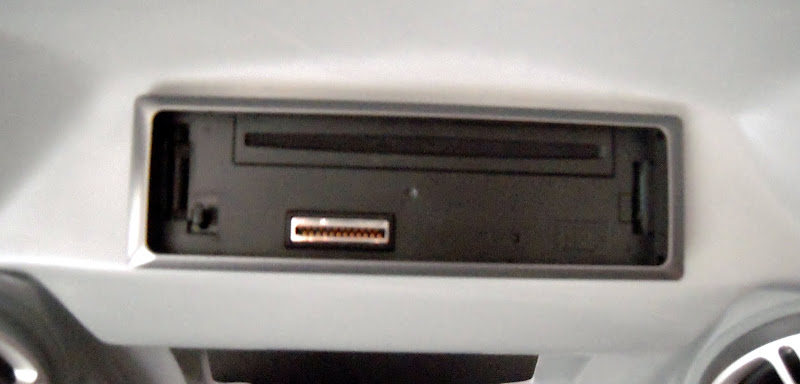
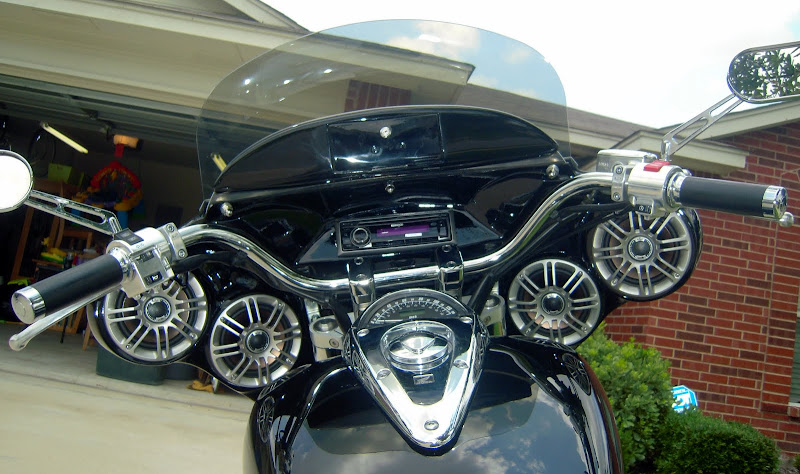
The first thing that I did was to mock the speakers and the stereo. I decided to use the Kenwood KMR-440U and the Polk DB521 5.25” speakers. The reason for these is obvious, they are both marine rated. Also, for the Kenwood Stereo, it has a front USB port and a front Aux input. The USB port can take a standard USB memory stick as well as it can control your IPod. The USB port will also charge any USB device i.e. cell phone, IPod, MP3, player, etc. Basically anything that complies with the USB standard.



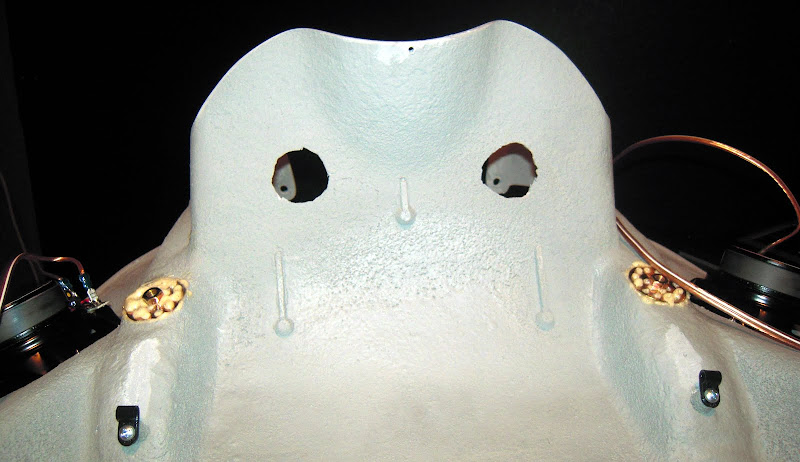
Next thing I did was to drill some port holes at the bottom of the fairing. They point to the headlight. The reason I did this was as a recommendation from the national board as well as the instructions that came with the fairing. This is to improve sound quality as well as to make it sound louder. Both the national board, as well as the Xtreme Revolution instructions recommended doing it next to the speakers. I decided against it because I did not like the look. I’m glad I did this, because when I drilled the holes, the fairing chipped. I blame myself because I did not apply the necessary pressure when drilling as well as I did not do it fast enough.


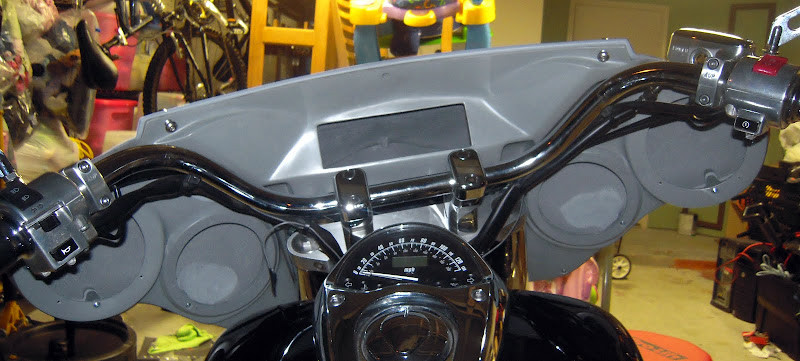
Next step was to mock the fairing on the bike. I first wanted to use the Memphis Shades mounting brackets that I had from my windshield. This did not work, it did not align properly. I tried bending the brackets, but I was not successful. So I decided to use Xtreme’s brackets. It was a lot easier and it also helped me in fine tuning the placement.




Here is a look at the port holes through the stereo housing. Port holes are pointing to the headlight.


When mocking the fairing, I had to remove the turn signals.


I highly recommend you place a rag or something on the front fender. This saved me many times on scratching the fender.
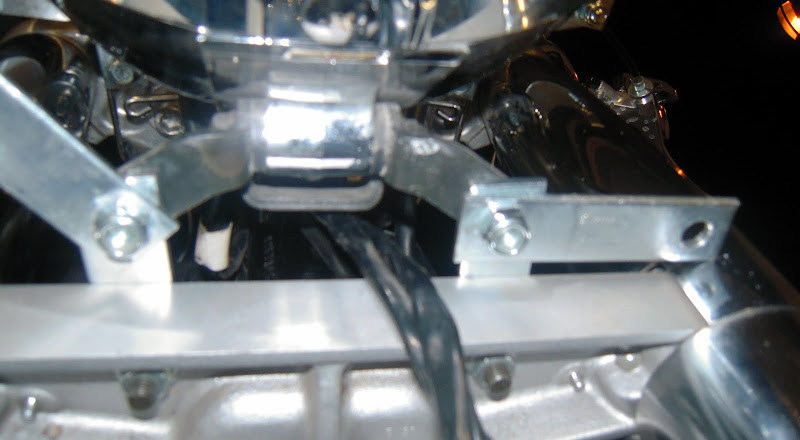
Here are some pics of the Xtreme brackets. Slightly tighten them. You will be adjusting them constantly when you mock the fairing as well as when you do the final install.
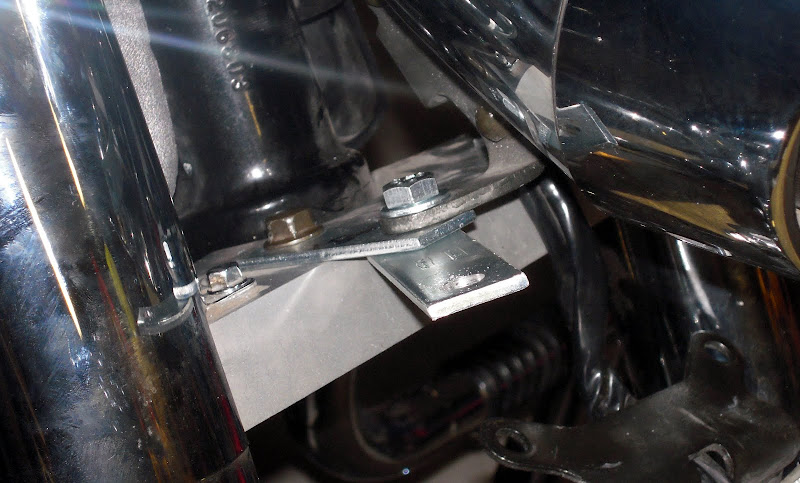
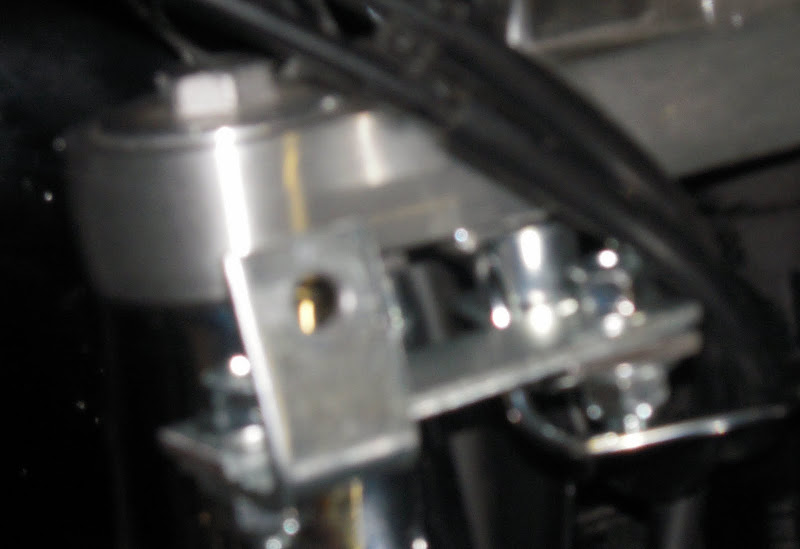
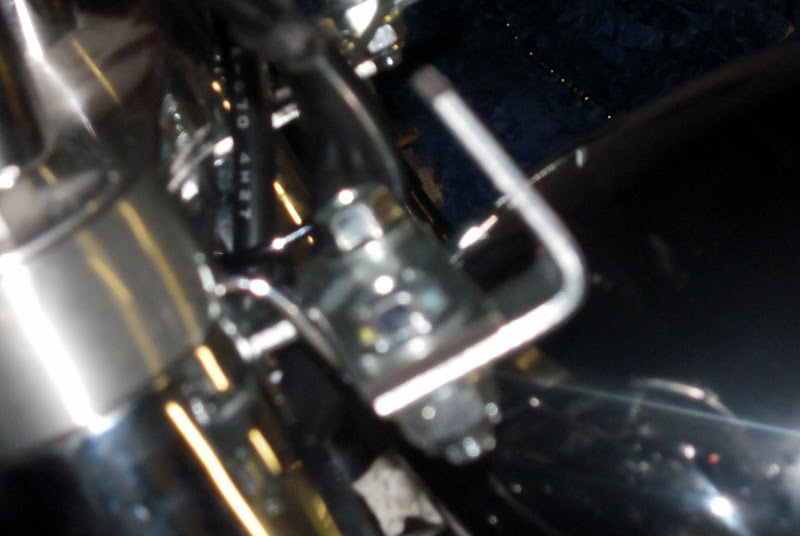
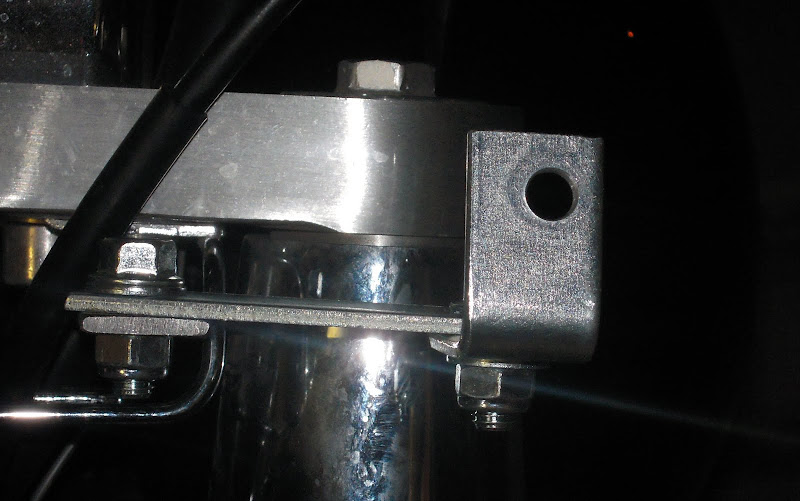
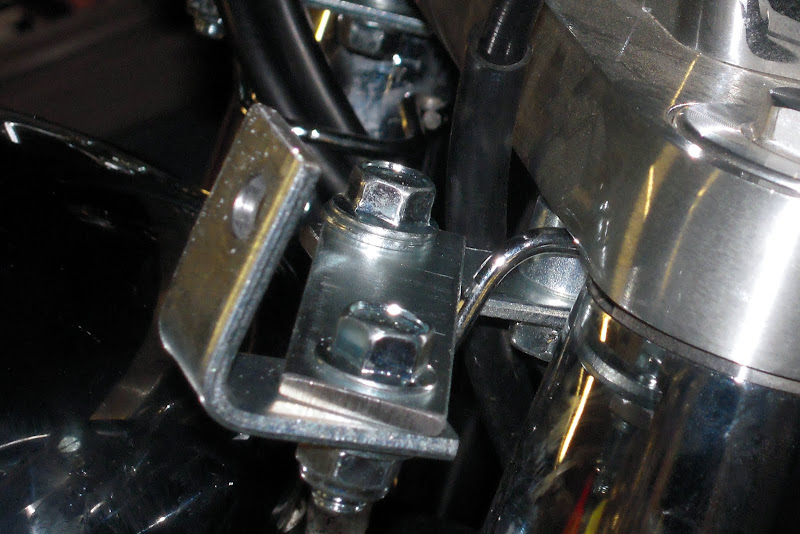
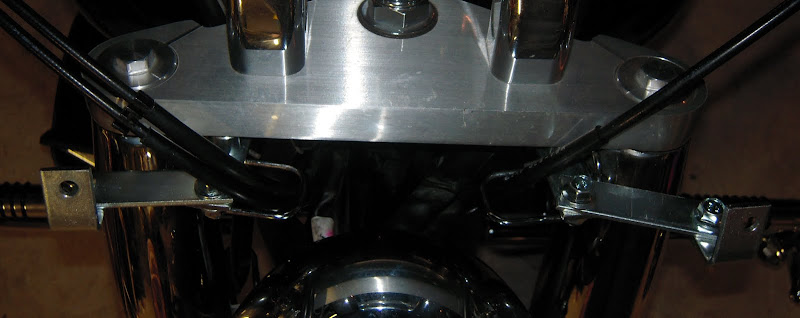


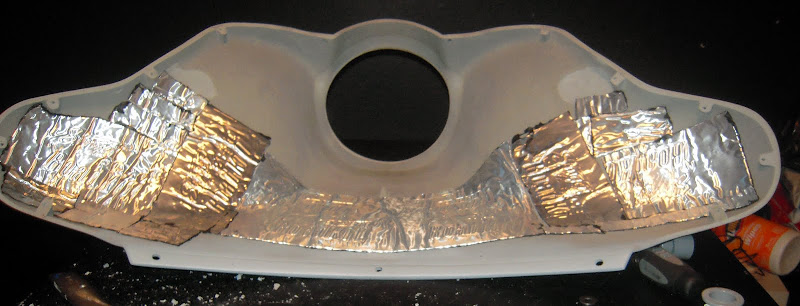
Next thing I did was to remove the fairing and add Dynamat. This is overkill, you do not have to do it, but I’m a little of an audiophile so I added it.


Next step was to install the fuse block with a relay as well as the ground block. I followed the following write up. This is an awesome website. It explained to me what a relay does (I had no idea) and also gave me the schematics for it http://www.cyclenutz.com/electrical/fuse_block_and_relay_installation.html I highly recommend that you poke around the website. There are a lot of electrical instructions that explain everything in plain English.
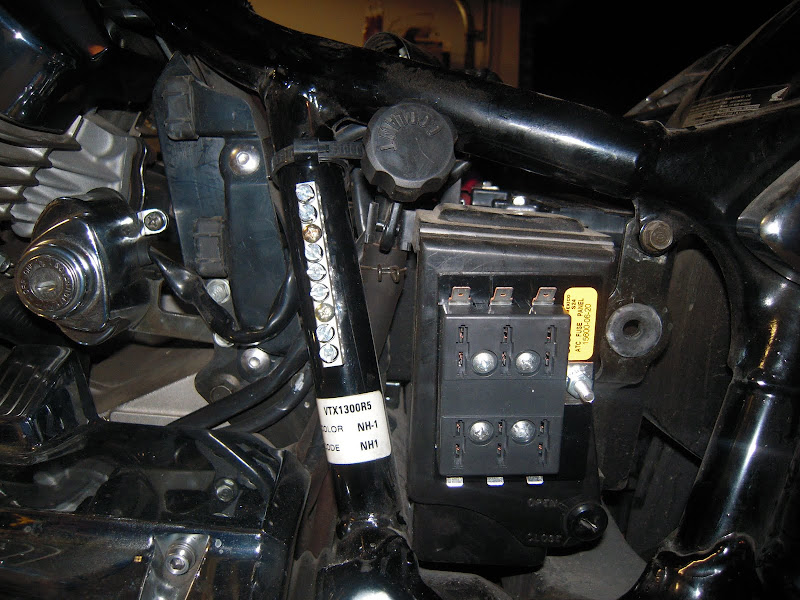


I installed the fuse block on the outside of the tool box. I got this idea from the national board. The ground block I got it from Home Depot. It is a ground block for home and/or industrial application. The fuse block and the relay I got from Autozone. There are motorcycle specific fuse and ground blocks, but they are expensive. These do the same job. As a matter of fact the fuse block from Autozone states that the fuse block can be used on boats. So I told myself, hey…this will work.
Next thing I did was to run the wiring. I used 10 gauge wires. This recommendation I got from the national board. I bought it from Autozone or Napa…I can’t remember, for those none wrench heads out there, buy red and black wire. I then followed the instructions from http://www.cyclenutz.com/electrical/fuse_block_and_relay_installation.html for the wiring. Try to route the wire as best as you can to keep it hidden as well as so it will not be pinched when you put her back together.
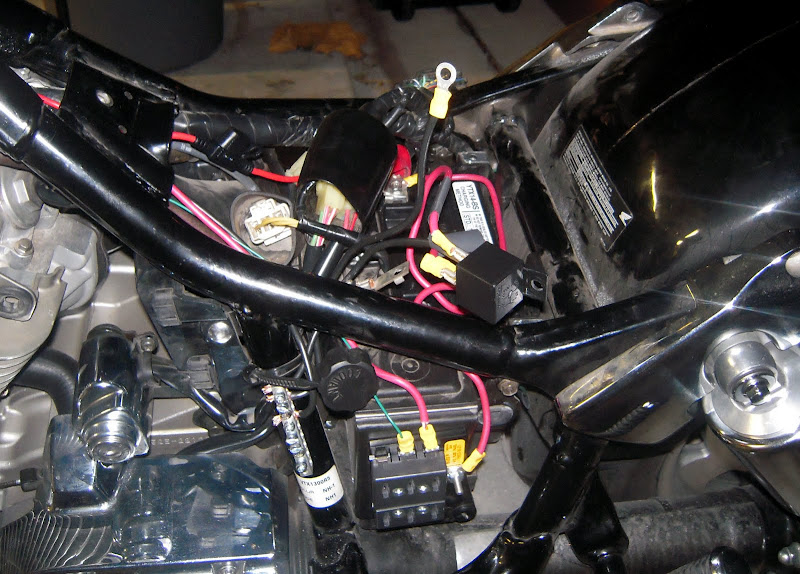
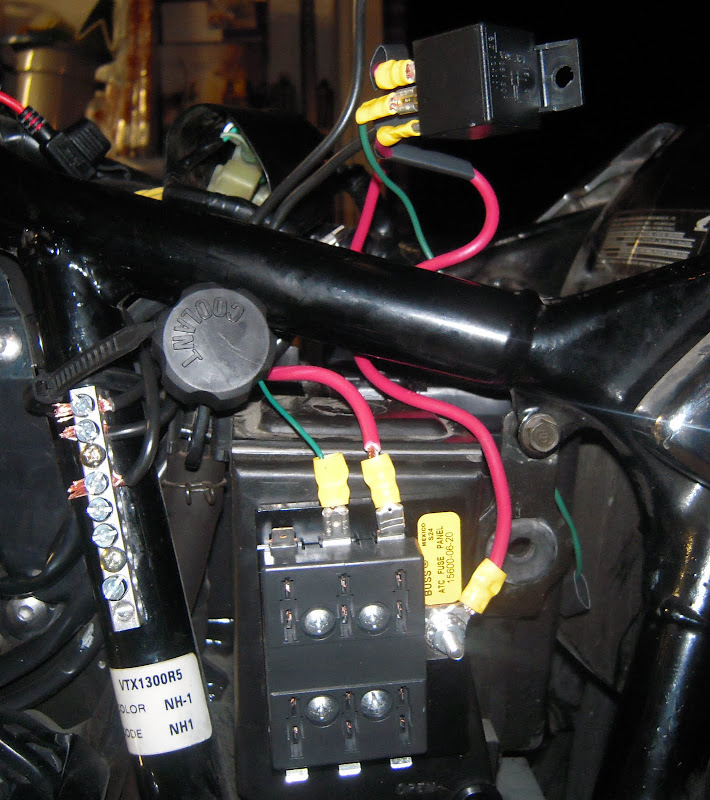
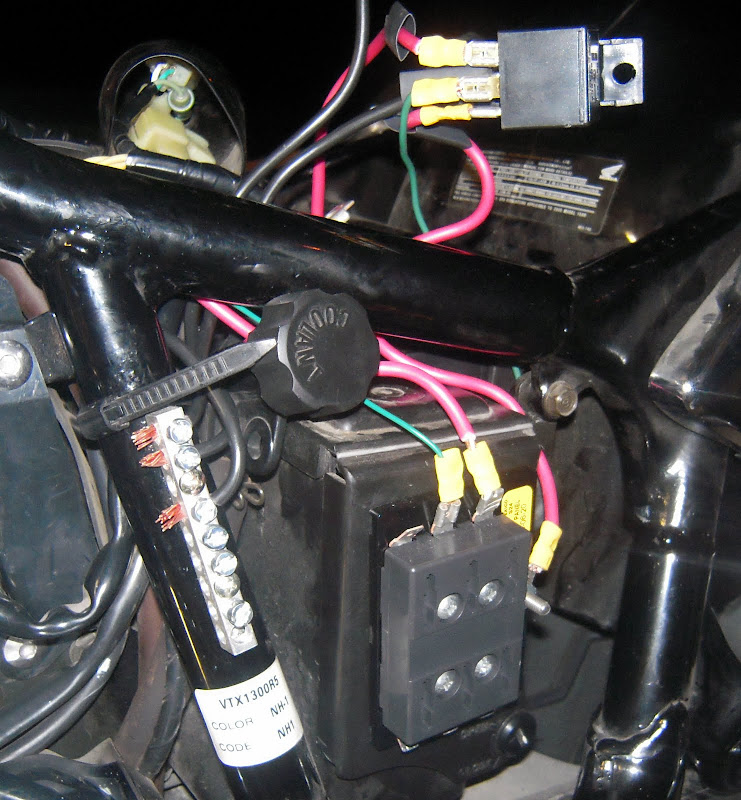

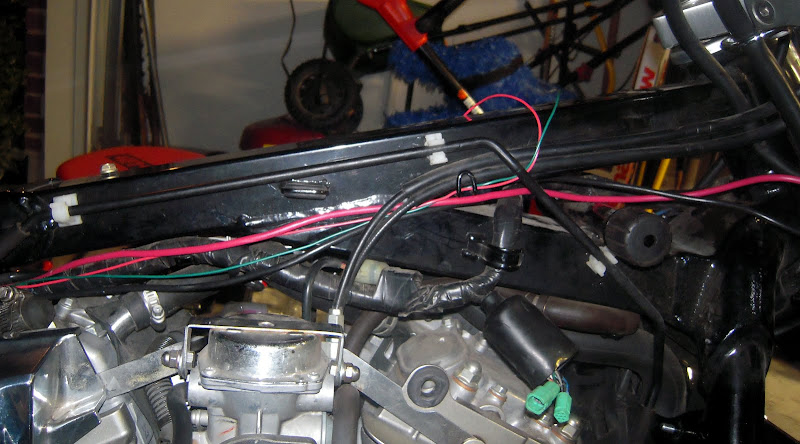


I also added an extra red wire for the power to the stereo memory as well as a green wire (which I already had but 16 gauge) for the powered hidden antenna. The memory wire has an inline 10A fuse that is connected straight to the battery. The powered antenna goes straight to the fuse block, also a 10A fuse. Don’t forget to use zip ties. This will keep the wires in place.

When I had all of this done, I sent the fairing to the painter. A word of caution when you send the fairing to the painter, or if you decide to paint the fairing yourself. Use an epoxy primer. Do not use a plastic primer. This can ruin the paint job. The Xtreme instructions state this. I left a copy of the painting instructions to my painter, but he did not follow them. He had issues when painting.

Next thing I did was follow the instructions of Xtreme Revolution regarding the wrapping of the wires of the stereo in foam. This will reduce significantly the rattling sound of the wires. I used the wrapping material that came in the box of the fairing. Also, I highly recommend that you use but plugs for all of the wires inside the fairing as well as the electrical connections that go in between the fairing and the fuse block. The reason for this is that you WILL encounter problems and it is very easy to plug and unplug the wires if you ever have a need to do it.


I did not mention where I positioned the relay. I decided to install it under the seat. I have a Mustang seat. The relay is screwed onto the plastic cover of the battery.


Next thing is to install the fairing after it came back from the painter. Be CAREFULL….you can scratch the paint as I did….wait a sec. I almost forgot. Per the recommendation of the painter, he advised not to glue both halves of the fairing together. I’m glad I followed his recommendation. If I did not follow his recommendation, It would have been a b*tch to install the stereo, run the wires and install the speakers. There are some gaps and both halves are not completely smooth. These imperfections are not very visible, but I’m glad I followed his recommendation. Another thing, by adding the Dynamat, the lower speakers hit the Dynamat and they are not completely flush. There is about 1/8 inch gap. If you do not like this, do not add the Dynamat.
Another problem that I encountered was the turn signal bar that goes under the headlight. I thought I had to get a relocation kit, but I did not. What I did was buy two 2.5” screws and some extra nuts and a whole bunch of washers. The first thing I did was lock down the head light with a washer and nut, then I filled the gap with some washers, then I slid in the turn signal bar, added one more washer and tighten everything up. Do not forget to use lock-tight or something similar and use a lot. Not only use the lock-tight here, but also when doing the final installation of the fairing.
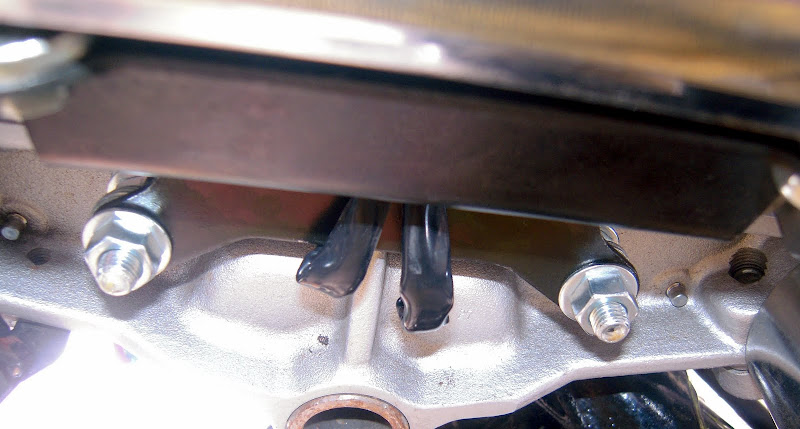
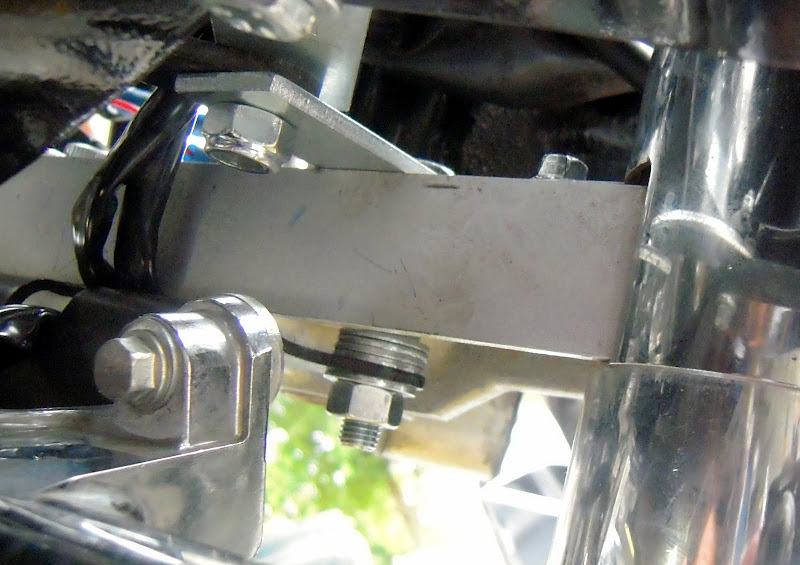


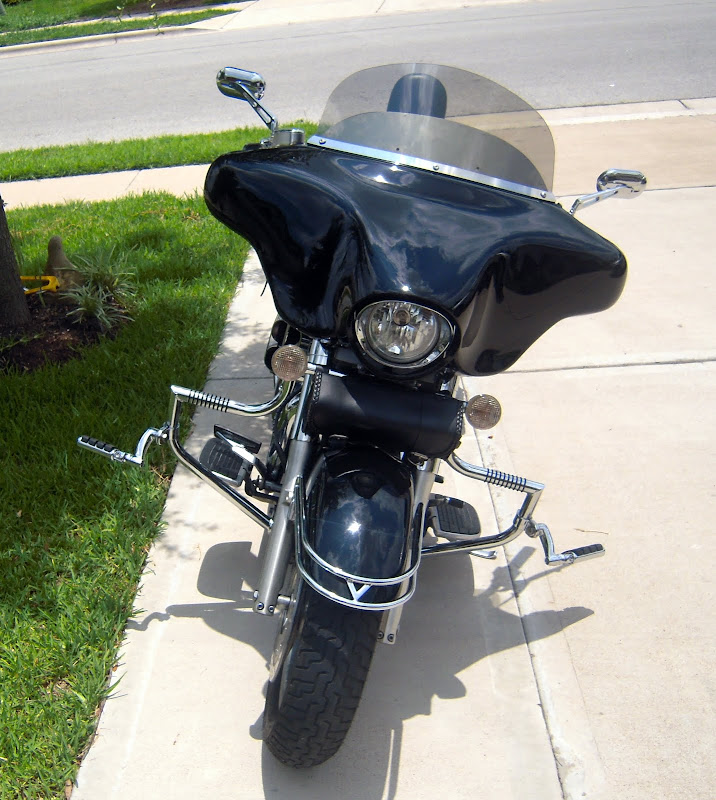
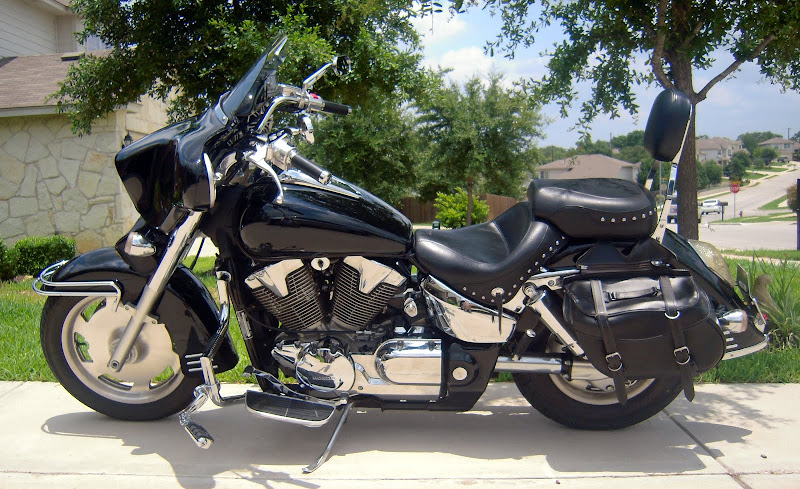
Here are the pics of the install. If you have any question, PM me and I will answer as best I can.
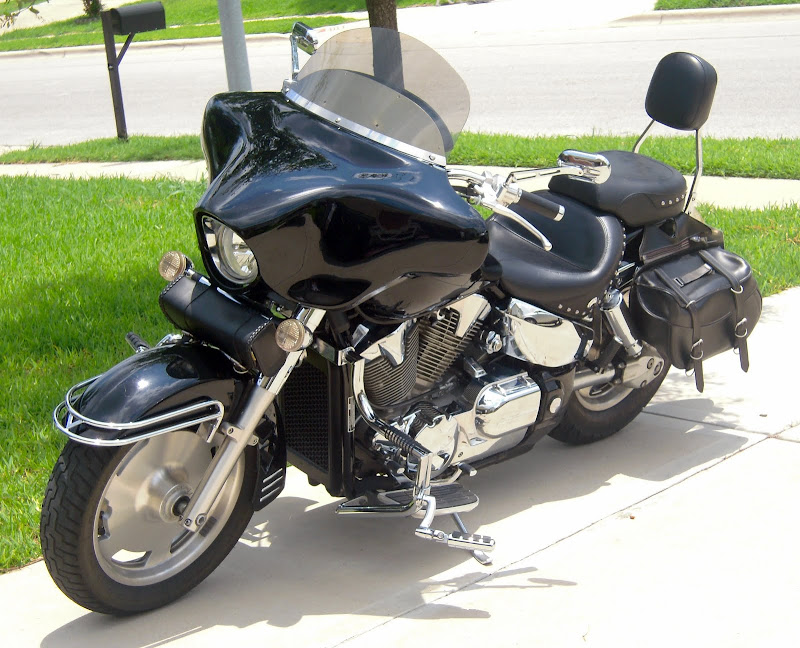
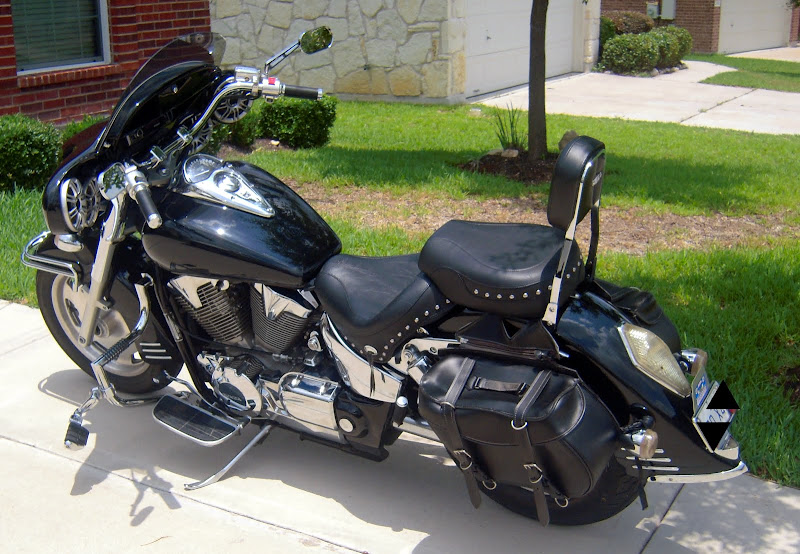
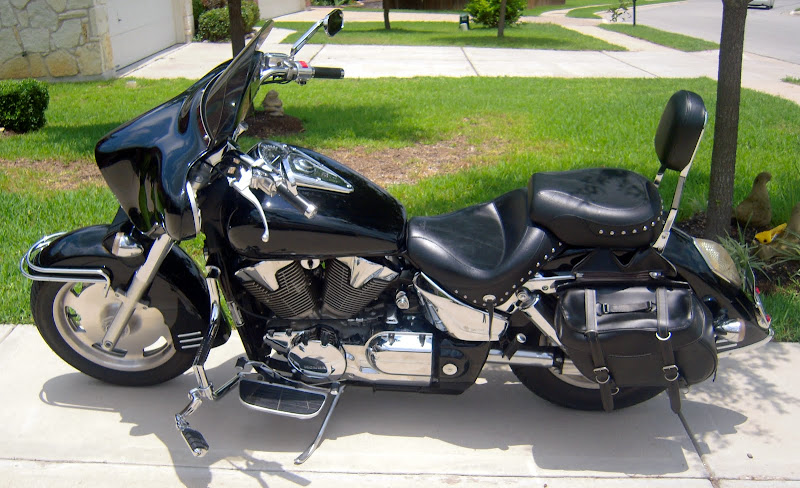



Logged
2005 VTX 1300
Vance & Hines Big Shots Staggered
Kuryakyn Pro Series Hypercharger
K&N Air Filter
Xtreme Revolution Fairing
Cobra Sissy Bar
Lindby Custom Engine Gaurd
Kuryakyn Foot Pegs
I lost count of all of the chrome she has :-D

matap

  • Board
  • Master of Monumental Proportions
  • ******
  • Posts: 4377
  • "Just put that hammer down and give it hell" -J.R.
Re: Fairing Project – 2005 Honda VTX 1300 R
« Reply #1 on: June 16, 2010, 09:24:23 PM »

Looks really good.  Excellent write up.  this one of those to keep as a favorite kinda write up.  You fo sho are a chrome whore!  :c  I like it.
Logged
"Talk low, talk slow and don't talk too much" - John Wayne

MRVTX

  • Texas X Rider OverLord
  • ******
  • Posts: 3109
  • Magnolia, TX
    • What I do...
Re: Fairing Project – 2005 Honda VTX 1300 R
« Reply #2 on: June 16, 2010, 09:45:26 PM »

Looks good!  Welcome to da club!  ;D  Nice write-up, too!
« Last Edit: June 16, 2010, 09:47:17 PM by MRVTX »
Logged

Gumbo

  • Board
  • Elvis
  • ******
  • Posts: 7980
  • 06 1800R
Re: Fairing Project – 2005 Honda VTX 1300 R
« Reply #3 on: June 17, 2010, 12:08:52 AM »

Killer wright up, and great job  :thumbup: :thumbup:
Logged
\"The moment you taste it, something wet and dark leaps on you and starts humping you like a swamp dog in heat, and the only way to get it off you is to eat it off, It\'s Gumbo!! If you don\'t eat it then the mystery beast will go right on humping you.

POGOGOLF

  • Texas X Rider OverLord
  • ******
  • Posts: 1221
  • Jeff in GA - '02 1800 C
Re: Fairing Project – 2005 Honda VTX 1300 R
« Reply #4 on: June 17, 2010, 04:13:23 AM »

Killer wright up, and great job  :thumbup: :thumbup:
+1
Logged
Ride Safe!! Jeff in GA <>< I believe in Easter
'02 1800 C model - 57,000 miles and climbing

Chad

  • Board
  • Elvis
  • ******
  • Posts: 5968
  • M G, TX.
Re: Fairing Project – 2005 Honda VTX 1300 R
« Reply #5 on: June 17, 2010, 06:56:46 AM »

Killer wright up, and great job  :thumbup: :thumbup:
Looks REALLY GREAT!!  :thumbup: :thumbup:
Logged
Member since 2004
RIP Torque Dec.18,1975-Apr.29,2009

dkjsr49

  • Old Timer
  • ****
  • Posts: 232
Re: Fairing Project – 2005 Honda VTX 1300 R
« Reply #6 on: June 17, 2010, 11:41:46 AM »

 :thumbup:Nice Job
Logged

Luckyx

  • Tejano
  • ***
  • Posts: 53
Re: Fairing Project – 2005 Honda VTX 1300 R
« Reply #7 on: June 24, 2010, 08:15:21 AM »

LOOKS Good

great job on the wiring

LATE
Logged


Uploaded with ImageShack.us
1800 Good reasons to Ride

TAZ

  • Texas X Rider OverLord
  • ******
  • Posts: 1714
  • Conroe TX.
    • The "TAZ" Machine
Re: Fairing Project – 2005 Honda VTX 1300 R
« Reply #8 on: June 26, 2010, 09:43:00 PM »

Great Job!!   :congrats:
Logged
Later,
"TAZ"
1300C


LEDS installed for $150.00 for members and $200.00 for non members. 14 pods, switch, fuse holder, 3amp fuse included for that price.
http://s193.photobucket.com/albums/z147/LEDTAZ/

RocknRoll

  • Texas X Rider OverLord
  • ******
  • Posts: 1636
  • Kingwood, TX
Re: Fairing Project – 2005 Honda VTX 1300 R
« Reply #9 on: June 27, 2010, 11:36:37 AM »

Slam dunk great job!! :thumbup: :thumbup: :thumbup:

I also really like the HD shield engine guards you have. :t :stickpoke:  giggle giggle.
Logged
Wanna make God laugh?  -  Tell him your plans!

Wanna make God angry?  -  Treat Him with indifference!

CouldBFaster

  • Texas X Rider OverLord
  • ******
  • Posts: 1051
Re: Fairing Project – 2005 Honda VTX 1300 R
« Reply #10 on: June 30, 2010, 08:31:38 PM »

bad Cranberries. :congrats:
Logged
Catching a yellow-jacket in your shirt at seventy miles per hour can double your vocabulary.

Honest officer .... I aint driving fast ..... just flying low ....


"I'll keep my money, my freedom and my guns, You can keep the "change"."

┌П┐ (•_•)┌П┐

matap

  • Board
  • Master of Monumental Proportions
  • ******
  • Posts: 4377
  • "Just put that hammer down and give it hell" -J.R.
Re: Fairing Project – 2005 Honda VTX 1300 R
« Reply #11 on: July 01, 2010, 08:35:03 AM »

Slam dunk great job!! :thumbup: :thumbup: :thumbup:

I also really like the HD shield engine guards you have. :t :stickpoke:  giggle giggle.

Those aren't HD, those are just Lindby's Engine guards.  :redcard: :couch:
Logged
"Talk low, talk slow and don't talk too much" - John Wayne

jarubio

  • Texas X Rider OverLord
  • ******
  • Posts: 1106
  • Round Rock, TX
Re: Fairing Project – 2005 Honda VTX 1300 R
« Reply #12 on: July 22, 2010, 02:11:47 PM »

Follow-up on my write up and experience with the fairing.

Fairing works great, the stereo and speaker are loud, and she blocks a lot of the wind, and there is little buffeting with the 10” windshield. I think I will go for a 12” later on for those long trips. The only problem is that the air comes from under the fairing and hits you on the chest, especially if I have my legs stretched out on the engine guard. When you hit highway speeds, it gets worse. I hope Xtreme Revolution comes up with some wings like Wide Open Custom. If not, I may have to figure out a way to make them myself. One more thing, when you wire the stereo, make sure you have enough slack on the wires so you can pull out the stereo easily, keep on reading of the reason why. Now to the bad news:

The fairing is completely off the bike, and it has been like that for several weeks. There is nothing wrong with the fairing. I have had several issues since the installation. I have major electrical problems with the X.

     1) At ROT she decided not to start. Thanks to David (Big Dog) he helped me get her running. We had to use a screw driver to bypass the starter switch and bridge the starter. This reminded me of my grandfathers station wagon, we sometimes had to do bridge the starter lol. I have been having this issue now for some time. I would tap the kickstand and/or wiggle the starter switch and/or the kill switch and she would start. Now, none of that works. The solution that I came up with was to install a switch that will bridge the starter. It works, but I don’t want it as a permanent fix. I have taken apart the starter switch and cleaned it thoroughly, I have also checked all of the cables and connections that pertain to the starter system (Clutch switch, kill switch, bike stand switch, etc). I have unplugged and cleaned them. I also double checked fuses, nothing. Any ideas is greatly appreciated.
     
     2) Also, during ROT, the headlight went out. Go figure. After disassembling the headlight and the putting it back together, the High-Beam only worked. Issues solved by getting a new bulb. Well, the problems did not stop there
     
     3) The  speedometer and the odometer as well as the backlight of the speedometer/odometer does not work. I have triple checked and cleaned the connectors that go to them that is under the gas tank. I have taken off the speedometer housing to check if anything was out of order. No, nothing at all. I also checked the fuses, all are in working order. Here I am at a stump. Any ideas is greatly appreciated
     
     4)Last but not least, the stereo stopped working. This I’m part to blame. I was riding the bike in a shopping center, I was looking for a place to park when in front of me, one of the most attractive women I have seen walks in front of me, stupid me, my head automatically turned to watch her walk in to a store, next thing I know I hit a ditch HARD, stereo all of a sudden stopped working. I had to take the fairing off so I could take the stereo out and check out the fuse. This is the reason of why to give enough slack on the wires when wiring the stereo. The Fuse is fine. The fuse block fusses are also fine. I can’t send the stereo for repair because I bought the stereo at a “non-Official” web outlet. Go figure, I bought the stereo on Amazon. Like Amazon is a flyby online store. So if you have any ideas of what it might be, I greatly appreciate it.

Sorry for the long dissertation.
Logged
2005 VTX 1300
Vance & Hines Big Shots Staggered
Kuryakyn Pro Series Hypercharger
K&N Air Filter
Xtreme Revolution Fairing
Cobra Sissy Bar
Lindby Custom Engine Gaurd
Kuryakyn Foot Pegs
I lost count of all of the chrome she has :-D

DEMON

  • Guest
Re: Fairing Project – 2005 Honda VTX 1300 R
« Reply #13 on: July 25, 2010, 10:11:57 AM »

When I get ready to do mine I hope you guys can help!!!!!   :notworthy:
Logged

jarubio

  • Texas X Rider OverLord
  • ******
  • Posts: 1106
  • Round Rock, TX
Re: Fairing Project – 2005 Honda VTX 1300 R
« Reply #14 on: August 06, 2010, 09:18:12 AM »

Update on electrical problems:

Got the starter switch issue solved. Thanks to the national board, I was pointed to the following link http://www.rattlebars.com/mtz/starter.html This solved the issue  ;D. Regarding the stereo, I also got that fixed. The problem was the power lead going in to the relay when the power was turned on. I grabbed another power lead. This time I’m using a power lead straight from the fuse box. This solved it  ;D. I still have the issue on the speedometer. I think I will need to take it to the stealer   :(    But at least I have tunes and I can start the bike normally  :bikerider: :bikerider: :bikerider:
Logged
2005 VTX 1300
Vance & Hines Big Shots Staggered
Kuryakyn Pro Series Hypercharger
K&N Air Filter
Xtreme Revolution Fairing
Cobra Sissy Bar
Lindby Custom Engine Gaurd
Kuryakyn Foot Pegs
I lost count of all of the chrome she has :-D
Pages: [1] 2


SimplePortal 2.3.3 © 2008-2010, SimplePortal